Install Kubernetes
Contents
Kubernetes on Azure
Azure makes it particularly easy to install a Kubernetes cluster. Start by adding a Kubernetes service:
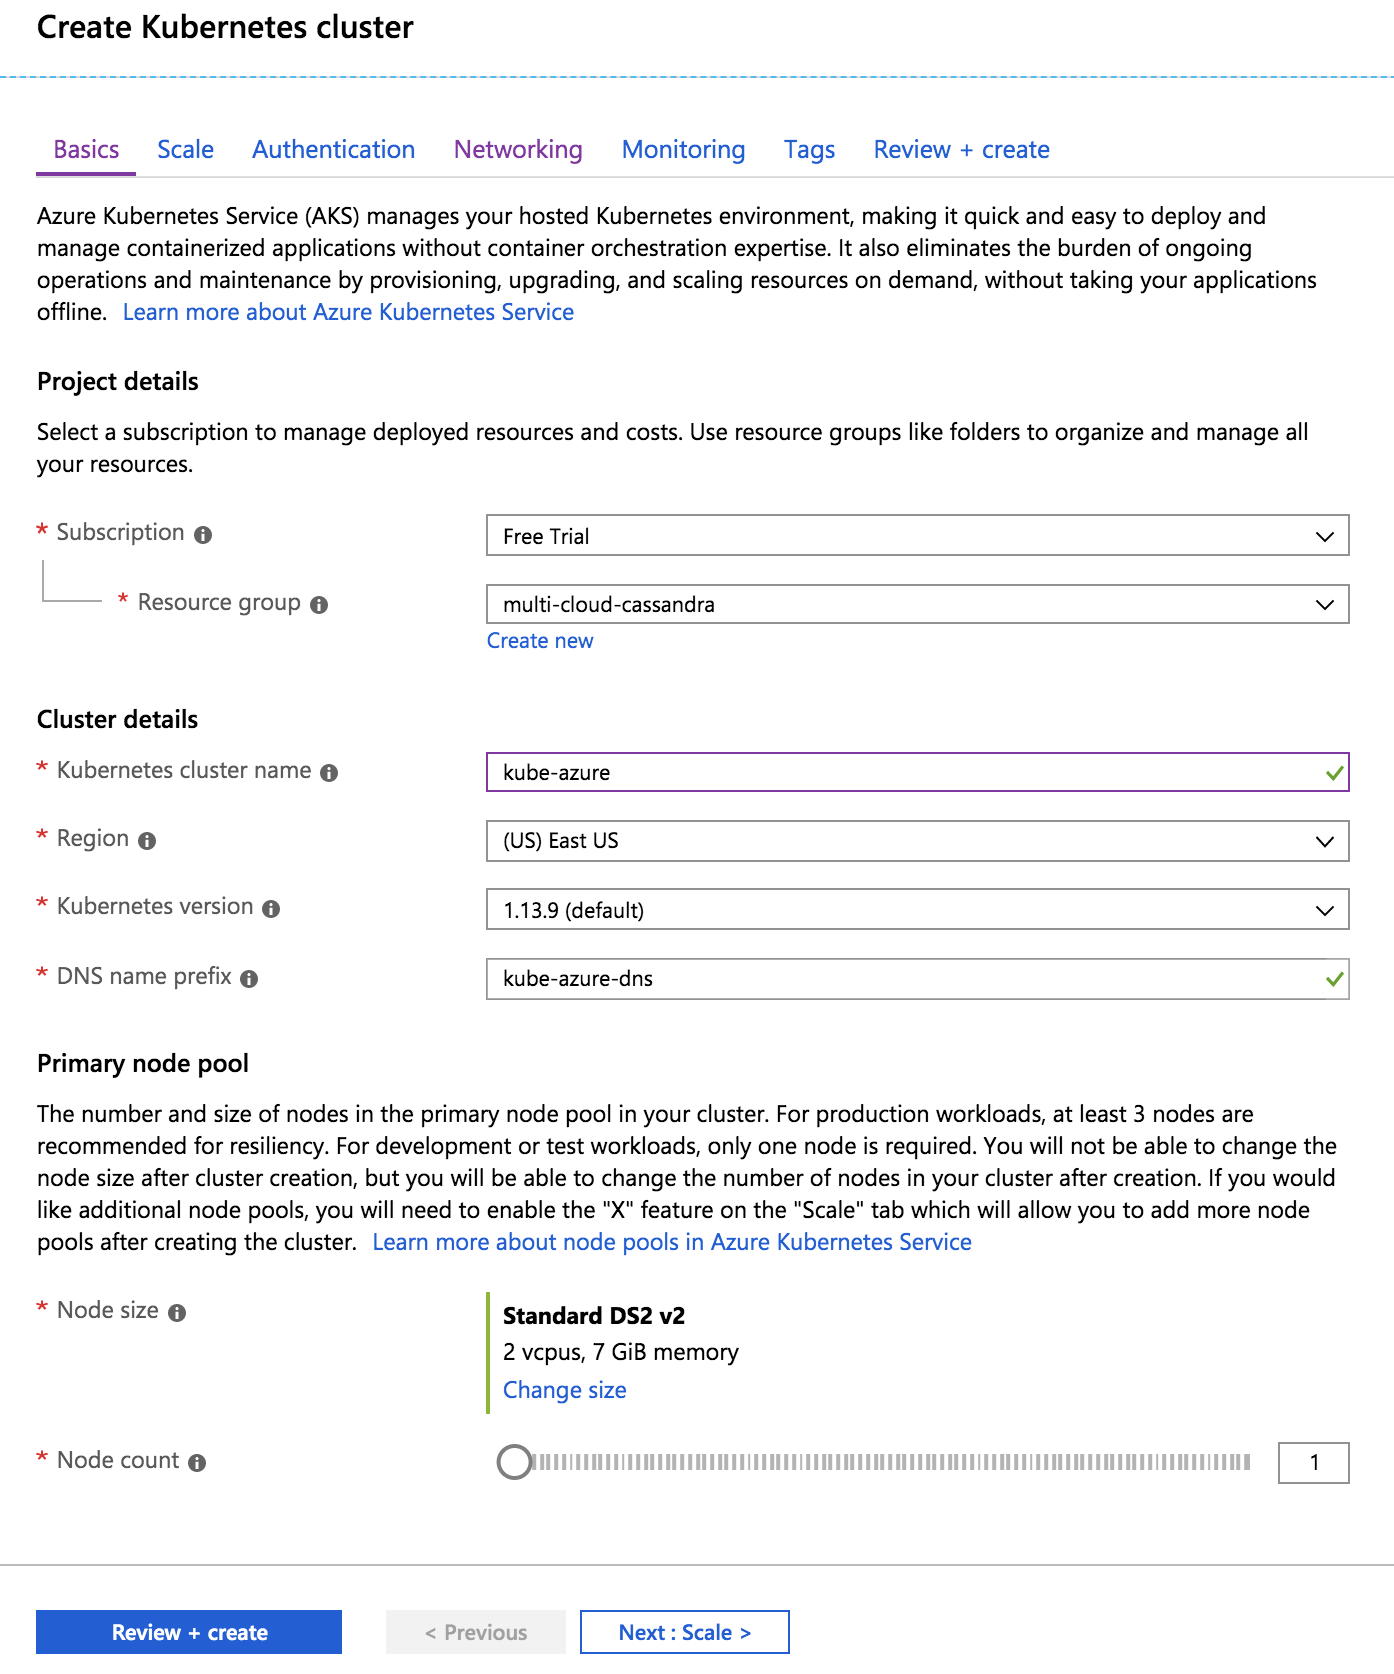
My free trial required a node count of 1, which is fine for this exercise. A production deployment should have at least 3 nodes.
On the Networking screen, disable HTTP application routing and enable Advanced network configuration. Select the virtual network and subnet you created earlier.

I left the other screens unchanged from their defaults.
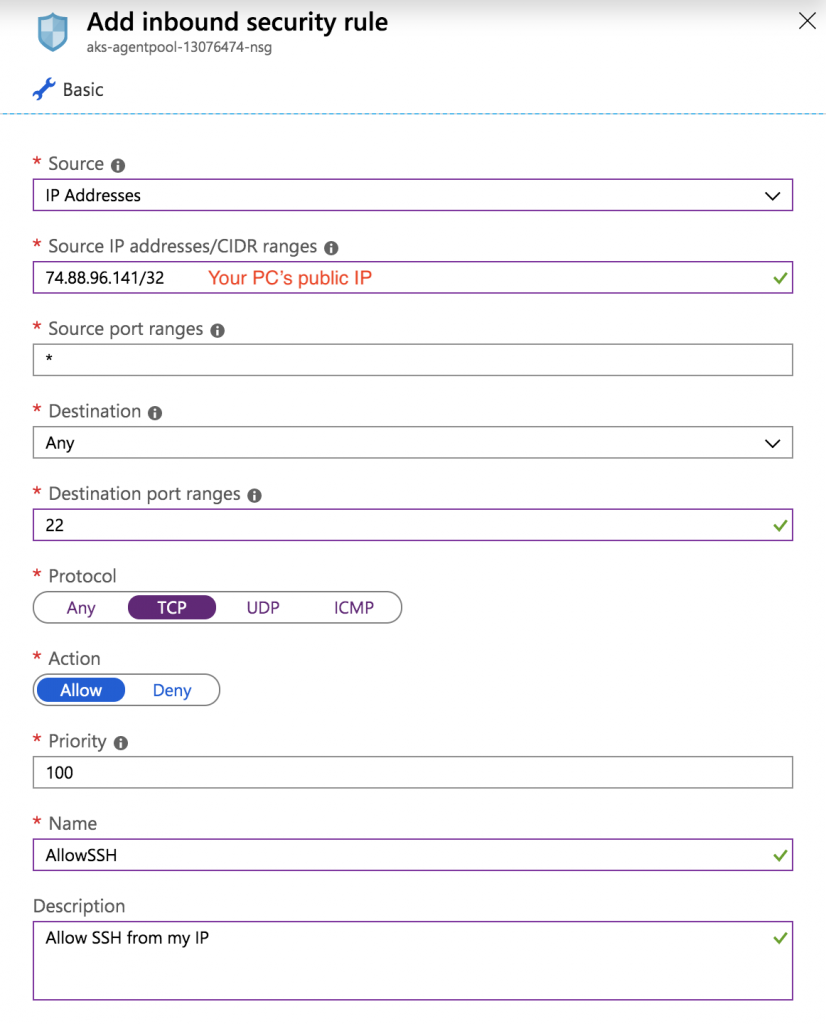
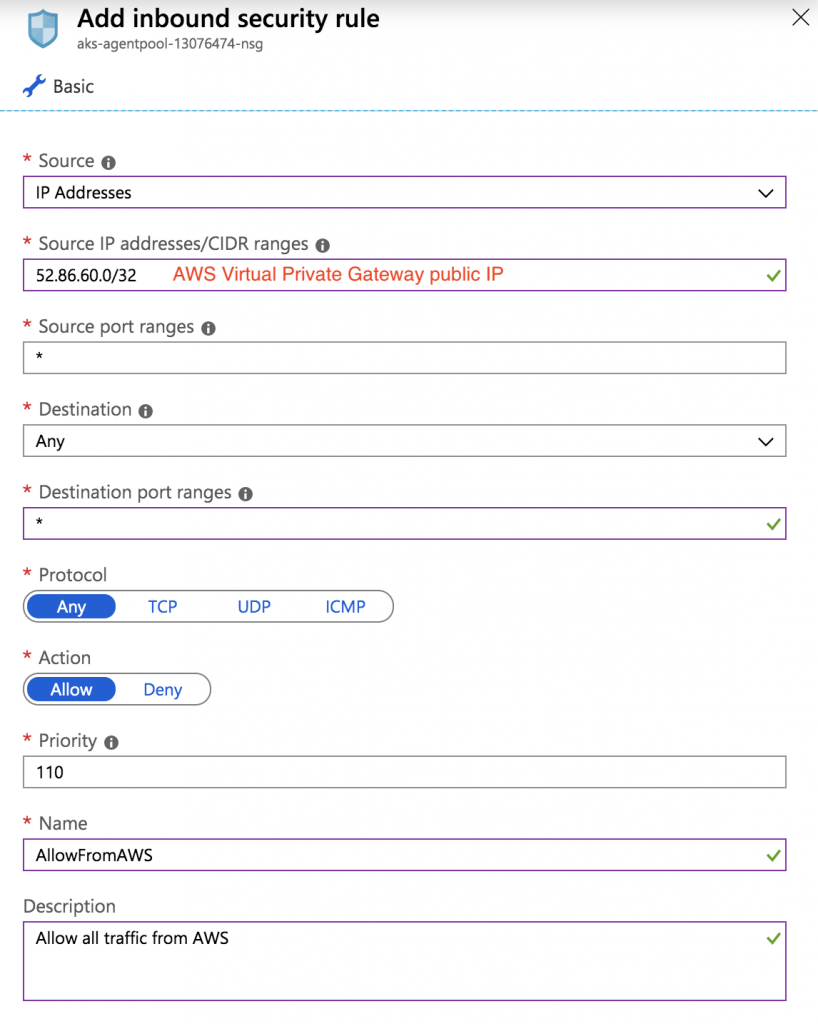
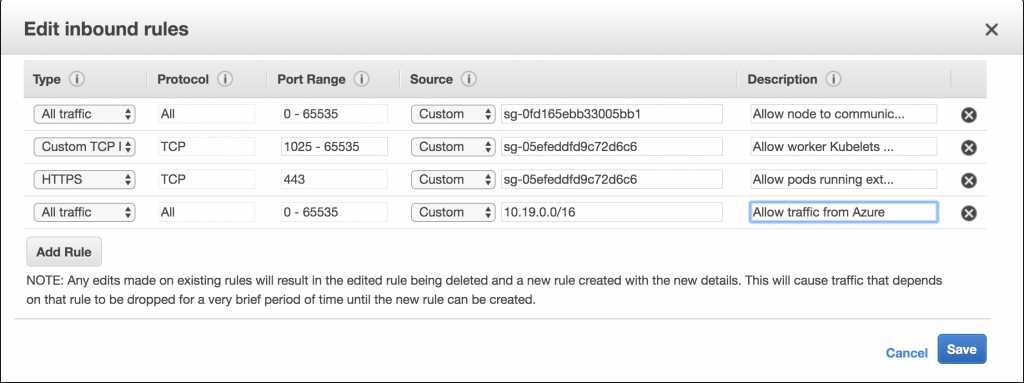
Azure creates the Kubernetes control plane, nodes with private IPs in the 10.19.1.0/24 subnet, and various other resources including a network security group that you can see on the “All resources” screen. You need to add an inbound security rule to the network security group to allow traffic from the AWS virtual private gateway IP, and also a rule to access your cluster over SSH from your PC (which you will need later).
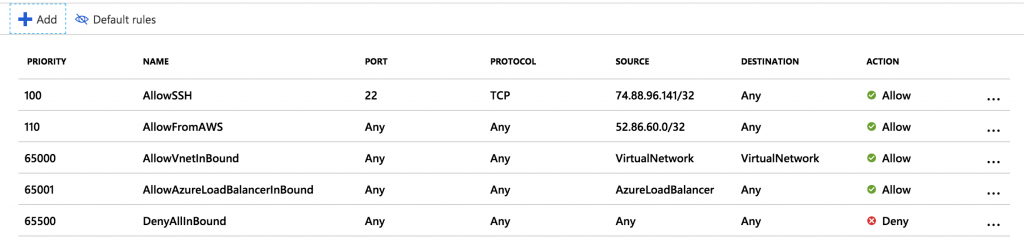
Your final inbound rules should look like this:
Connect to Azure AKS Cluster
Azure’s Cloud Shell will automatically log you into your account, or alternatively you can run az login in your terminal. Once logged in, run az aks get-credentials --resource-group multi-cloud-cassandra --name kube-azure to add and activate a kube-azure context. Then you can confirm connectivity to AKS with:
$ kubectl get nodes
NAME                       STATUS    ROLES     AGE       VERSION
aks-agentpool-13076474-0   Ready     agent     140m      v1.13.9
View the AKS Dashboard
First run the following command to grant admin privileges to the dashboard’s service account. (Note that this is not recommended for a production K8S environment.)
$ kubectl create clusterrolebinding kubernetes-dashboard --clusterrole=cluster-admin --serviceaccount=kube-system:kubernetes-dashboard
Then launch the dashboard with the following command:
$ az aks browse --resource-group multi-cloud-cassandra --name kube-azure
Kubernetes on AWS
Setting up Kubernetes in AWS is more of a manual process, with several pitfalls to avoid. I followed this page, except you can skip the prerequisite “Create your Amazon EKS Cluster VPC.”
Create the EKS Service Role
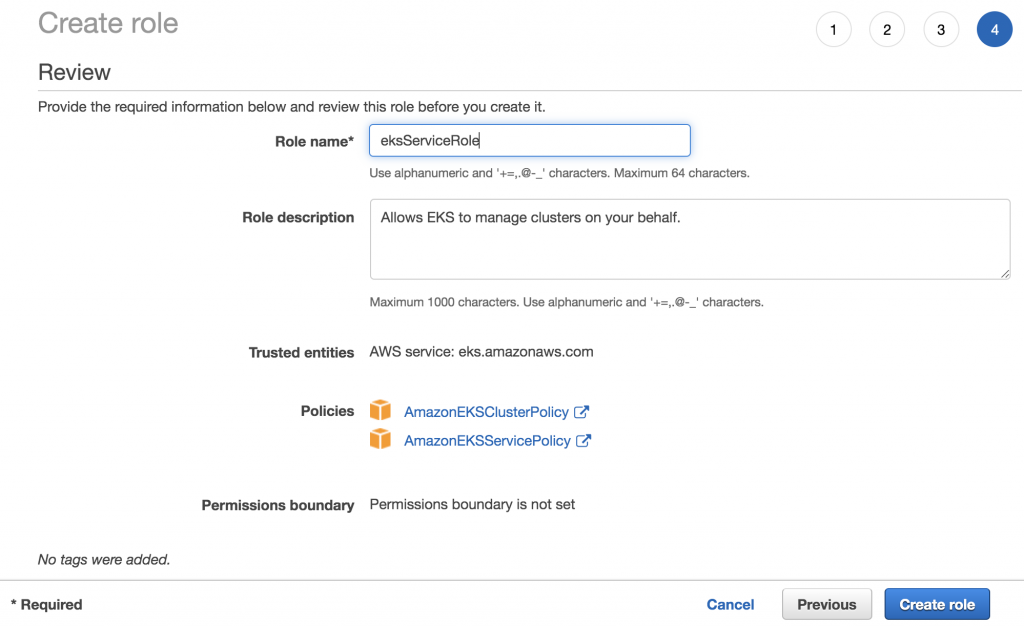
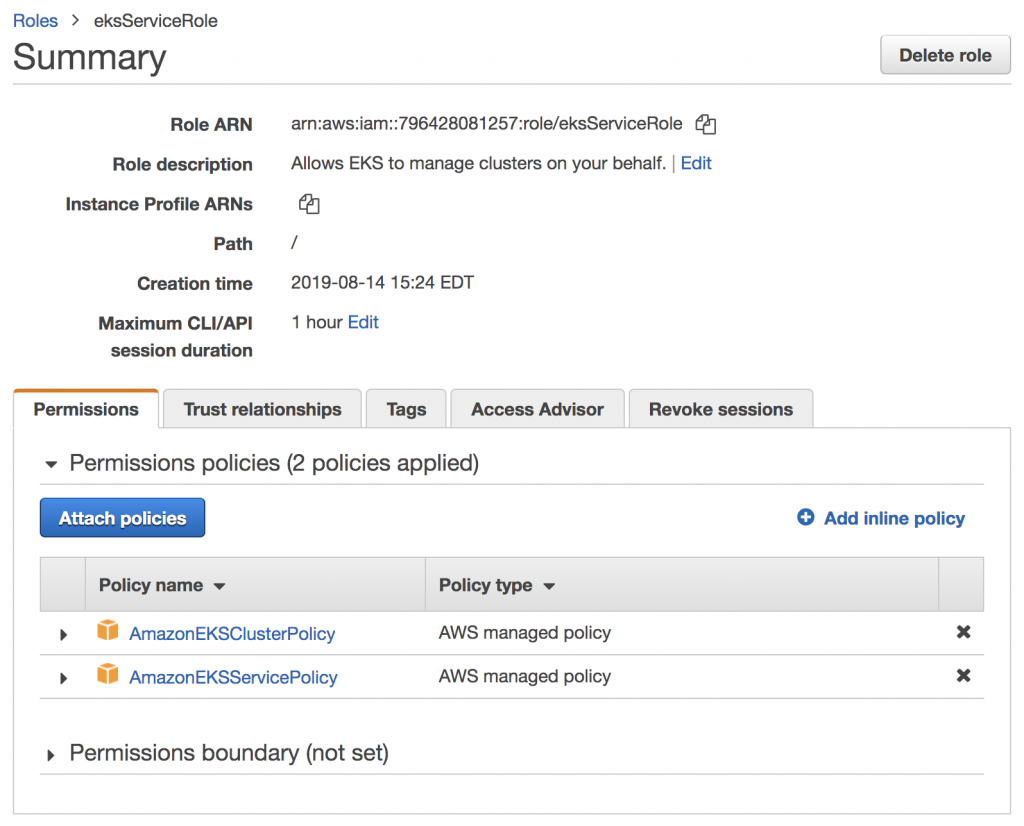
Note the Role ARN, which you will use when creating the EKS cluster.
Install the kubectl binary and latest awscli if you don’t already have them.
Create the EKS User
Now when installing the EKS cluster, one gotcha which is mentioned is that the IAM entity that creates the cluster is the only user that can initially make calls to the cluster’s API server. After being burned creating the cluster with the root AWS user in the AWS console, I started over using the CLI. Here are the steps I ran with some trial-and-error.
Create an IAM policy “eks-cli” with the following JSON:
{
  "Version": "2012-10-17",
  "Statement": [
    {
      "Effect": "Allow",
      "Action": [
        "eks:*",
        "sts:*",
        "iam:PassRole"
      ],
      "Resource": "*"
    }
  ]
}
Create a group called “eks” with this policy. Then create a new IAM user “eks-cli” with programmatic access and add it to the group. Note the access key ID and secret access key.
Add the user to your local ~/.aws/credentials file:
[eks-cli]
aws_access_key_id = ACCESS_KEY_ID
aws_secret_access_key = SECRET_ACCESS_KEY
Add the profile to your local ~/.aws/config file, specifying the VPC region from earlier:
[profile eks-cli]
output = json
region = us-east-1
You can now assume this user profile by setting the AWS_PROFILE environment variable:
$ export AWS_PROFILE=eks-cli
$ aws configure list
      Name                    Value             Type    Location
      ----                    -----             ----    --------
   profile                  eks-cli           manual    --profile
access_key     ****************XVDA shared-credentials-file
secret_key     ****************ledQ shared-credentials-file
    region                us-east-1      config-file    ~/.aws/config
Create the EKS Cluster
In order to create your EKS cluster, you need a few pieces of information from earlier:
- The EKS service role ARN
- The 2 VPC subnet IDs
- The group ID of the default VPC security group
Create the cluster control plane, allowing both public and private access to the Kubernetes API server endpoint. (It took some trial-and-error to figure out that public API access was needed. The issue was that my worker nodes were not joining the cluster without public API access. Additionally, this page states that “Worker nodes also require outbound internet access to the Amazon EKS APIs for cluster introspection and node registration at launch time,” which seems to imply that the cluster requires a public API.)
$ aws eks create-cluster --name kube-aws --role-arn ROLE_ARN --resources-vpc-config subnetIds=SUBNET_ID_1,SUBNET_ID_2,securityGroupIds=VPC_SECURITY_GROUP_ID,endpointPublicAccess=true,endpointPrivateAccess=true
You will see JSON output indicating the cluster is being created. A few minutes later, the cluster is ready.
$ aws eks describe-cluster --name kube-aws
{
    "cluster": {
        "name": "kube-aws",
        "arn": "arn:aws:eks:us-east-1:796428081257:cluster/kube-aws",
        "createdAt": 1565831792.558,
        "version": "1.13",
        "endpoint": "https://21CB10EEACFB1544CCDB0590AE7D6815.sk1.us-east-1.eks.amazonaws.com",
        "roleArn": "arn:aws:iam::796428081257:role/eksServiceRole",
        "resourcesVpcConfig": {
            "subnetIds": [
                "subnet-0961bcc55b28919da",
                "subnet-0b43ea1db7e2e3ddb"
            ],
            "securityGroupIds": [
                "sg-05efeddfd9c72d6c6"
            ],
            "vpcId": "vpc-0985e52244919a611",
            "endpointPublicAccess": true,
            "endpointPrivateAccess": true
        },
        "logging": {
            "clusterLogging": [
                {
                    "types": [
                        "api",
                        "audit",
                        "authenticator",
                        "controllerManager",
                        "scheduler"
                    ],
                    "enabled": false
                }
            ]
        },
        "status": "ACTIVE",
        "certificateAuthority": {
            "data": "..."
        },
        "platformVersion": "eks.2"
    }
}
Follow the instructions to configure a kubeconfig file for kubectl. There are multiple ways to set this up, using the cluster name, role ARN or AWS profile name. Use the role ARN or profile name if you don’t want to rely on the current value of the AWS_PROFILE environment variable. Since I was already logged in as the eks-cli user, I ran:
$ aws eks --region us-east-1 update-kubeconfig --name kube-aws --alias kube-aws
Added new context kube-aws to /Users/bbesterman/.kube/config

$ kubectl get svc
NAME         TYPE        CLUSTER-IP   EXTERNAL-IP   PORT(S)   AGE
kubernetes   ClusterIP   172.20.0.1           443/TCP   6m51s
You can now switch back and forth between the Azure and AWS Kubernetes contexts easily:
$ kubectl config use-context kube-azure
Switched to context "kube-azure".
$ kubectl get svc
NAME         TYPE        CLUSTER-IP   EXTERNAL-IP   PORT(S)   AGE
kubernetes   ClusterIP   10.0.0.1             443/TCP   4h26m
$ kubectl config use-context kube-aws
Switched to context "kube-aws".
$ kubectl get svc
NAME         TYPE        CLUSTER-IP   EXTERNAL-IP   PORT(S)   AGE
kubernetes   ClusterIP   172.20.0.1           443/TCP   18m
Install EKS Worker Nodes
To install the EKS worker nodes, follow step 3 of the instructions and use Cloud Formation. (You may want to create an EC2 key pair beforehand if you don’t have one to use for the KeyName.)
For the ClusterControlPlaneSecurityGroup, choose the cluster security group shown in the output above. For the worker network configuration, choose the VPC and 2 subnets you set up earlier. I chose the t3.medium EC2 instance type and otherwise left the recommended node counts at their defaults.
After the stack is created, complete the steps to enable the worker nodes to join the cluster. Once the workers are ready, confirm you can connect to the cluster.
$ kubectl get nodes
NAME                         STATUS    ROLES     AGE       VERSION
ip-10-9-1-111.ec2.internal   Ready         53m       v1.13.8-eks-cd3eb0
ip-10-9-2-227.ec2.internal   Ready         53m       v1.13.8-eks-cd3eb0
ip-10-9-2-72.ec2.internal    Ready         53m       v1.13.8-eks-cd3eb0
Install the Kubernetes dashboard by following the steps on this page.
Phew! You are done installing Kubernetes on AWS. However, there is one more step which is needed to allow traffic from Azure to the AWS worker nodes. You do this by modifying the worker nodes’ security group, allowing all traffic from the 10.19.0.0/16 network.
Now you can proceed to install Cassandra in each cluster. Kubernetes makes this part much easier than having to install and configure Cassandra nodes individually.